IML Printing Process:Label Materials, Printing Requirements and Injection Molding Integration
2026-10-07 14:33:49
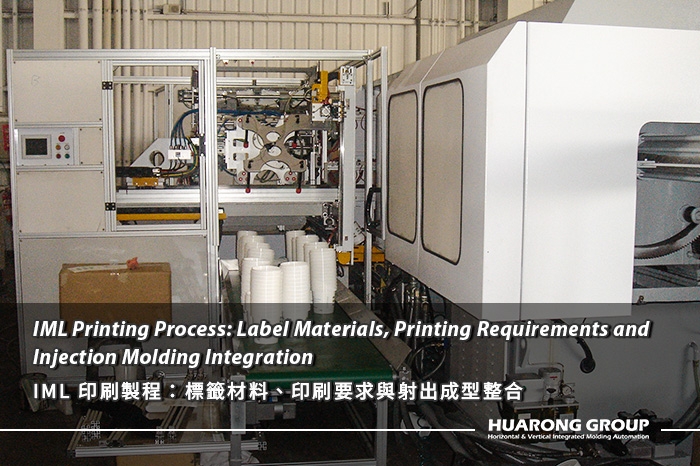
In-mold labeling (IML) connects printed labels directly with injection-molded plastic parts. Instead of applying a label after molding, a pre-printed label is positioned inside the mold before injection, allowing the label and molded part to become an integrated decorated product.
For an IML project, however, the injection molding machine is only one part of the process. Label material, printing method, artwork, cutting accuracy, stacking, label pickup and mold positioning all influence whether the printed label can be transferred and molded consistently.
This makes IML printing an important engineering interface between the label supplier, mold builder, automation system and injection molding process.
IML printing refers to the preparation and printing of labels that will subsequently be placed inside an injection mold and integrated with the molded plastic product.
The process normally follows a sequence such as:
Artwork → Printing → Die Cutting → Label Stacking → Robotic Pickup → Mold Positioning → Injection Molding → Decorated Part
Unlike conventional post-molding labeling, the printed label must be designed not only for visual appearance but also for handling, positioning and compatibility with the molding process.
Traditional labeling generally applies a label after the plastic part has already been molded. Depending on the application, this may involve adhesive labels, pressure-sensitive labels, sleeves or other secondary decoration methods.
With IML, the label is introduced before injection molding.
The label must therefore satisfy two sets of requirements:
1. Printing and visual requirements — graphics, colors, barcode readability, registration and surface appearance.
2. Molding and handling requirements — substrate compatibility, dimensional stability, stiffness, pickup, positioning and behavior during injection.
This distinction is important when defining an IML label. A label that prints well is not necessarily a label that will run reliably through an automated IML system.
Printing is one stage in a larger production chain.
After artwork preparation, the selected label material is printed and then converted into individual labels. The labels must maintain consistent dimensions and orientation during die cutting and stacking so that an automated pickup system can reliably transfer each label.
During molding, the label is positioned against the mold surface before plastic injection. The injection process then forms the plastic component while integrating the label with the molded surface.
The printing process therefore needs to be considered together with label geometry, mold design, robot handling and injection conditions, rather than as an isolated printing operation.


An IML label typically consists of a printable substrate and printed layers designed for integration with the molded product. The exact construction depends on the application, resin, appearance requirements and label supplier's specifications.
Polypropylene (PP) is commonly used for IML applications, particularly when the molded product is also based on PP. However, the appropriate substrate should be determined according to the complete application rather than selected solely from the base resin name.
Important considerations include:
- Compatibility with the molding resin
- Label thickness
- Surface characteristics
- Dimensional stability
- Flexibility and stiffness
- Printability
- Resistance to the molding environment
- Required final appearance
The label supplier should provide the material grade and relevant technical data for the intended application.
The relationship between the label and molding resin is critical.
When the label and molded material have suitable compatibility, the molding process can integrate the printed label with the product surface. If the materials or process conditions are not appropriately matched, problems may occur in adhesion, appearance, positioning or final part quality.
For an RFQ, specify the intended molding resin and grade whenever possible. If the resin has not yet been finalized, this should be identified as an open project parameter.
Label thickness affects more than the final appearance.
It can influence:
- Label handling
- Robotic pickup
- Label flexibility
- Position retention
- Mold insertion
- Surface conformity
- Final part dimensions
A very flexible label may be more difficult to handle automatically, while a label with greater stiffness may require different pickup or positioning considerations.
For this reason, label thickness should be treated as an engineering input rather than simply a printing specification.
The label surface needs to work with the selected printing process and automated handling system.
Factors such as surface friction, static behavior and separation characteristics can influence whether labels can be picked individually from a stack.
The label supplier and automation integrator should therefore evaluate the complete path from printed sheet or roll to individual label pickup and mold insertion.
Different printing technologies can be used for IML labels depending on production volume, artwork complexity, color requirements, substrate and project economics.
The appropriate printing method should be confirmed with the label supplier because actual capabilities vary by equipment and material construction.
Offset printing can be used for high-quality graphics and applications requiring detailed artwork and consistent reproduction.
It may be suitable for projects where:
- Detailed graphics are required
- Multiple colors are involved
- Consistent image reproduction is important
- Production volume supports the setup process
For IML applications, the printing process must also be evaluated together with the selected substrate and subsequent die-cutting requirements.
Flexographic printing is widely used for various packaging applications and can be adapted to suitable IML label materials.
Its suitability depends on:
- Label material
- Ink system
- Artwork
- Production volume
- Required print quality
- Label supplier capabilities
For an IML project, the important question is not simply which printing method is most common, but whether the complete printed label can meet the requirements of the downstream molding process.
Gravure printing can be considered for applications requiring consistent reproduction over larger production volumes.
It may be appropriate when the project involves:
- Large production quantities
- Detailed graphics
- Consistent color reproduction
- Established artwork and repeat production
Because printing setup and production economics vary by supplier, the expected annual volume should be provided when requesting an IML label quotation.
Digital printing can provide flexibility for short runs, variable graphics, product versions or projects where extensive printing setup is less desirable.
Potential applications include:
- Prototype development
- Market testing
- Multiple artwork versions
- Short production runs
- Customized packaging
However, digital printing capabilities depend heavily on the selected label material, printer and ink system.
A practical comparison should consider more than printing cost.
| Printing consideration | Project question |
| Production volume | How many labels are required annually? |
| Artwork | How complex are the graphics and colors? |
| Versions | Are multiple artwork versions required? |
| Substrate | Which label material will be used? |
| Registration | What dimensional accuracy is required? |
| Color | Are brand colors or specific color references required? |
| Lead time | How quickly are labels required? |
| Die cutting | What label geometry is required after printing? |
The final printing method should be confirmed with the label supplier based on the complete project specification.
Artwork preparation for IML labels should account for the final molded geometry rather than treating the label as a conventional flat printed graphic.
The label drawing should correspond to the actual product geometry and label placement area.
If the label is applied to a curved or non-flat surface, the artwork may require adjustment to account for the final geometry and viewing condition.
For complex parts, the mold designer, label supplier and automation team should work from the same product and label data.
Registration accuracy determines how consistently printed graphics align with the finished label.
Registration should be considered at several stages:
Artwork → Printing → Die Cutting → Label Pickup → Mold Positioning → Final Product
A registration problem introduced during printing or die cutting can become a visible product defect after molding.
White ink or opaque layers may be required when the design needs controlled background appearance, color separation or visual contrast.
The exact layer construction depends on the label supplier and printing system.
For RFQ purposes, clearly identify areas that require:
- White printing
- Opaque coverage
- Transparent effects
- Special visual treatment
- Specific color references
Barcodes, QR codes, small text and fine graphics should be evaluated at the actual label size.
Consider:
- Final printed dimensions
- Contrast
- Registration tolerance
- Scanning requirements
- Minimum text size
- Molded surface geometry
If barcode scanning is part of the product specification, verification should be performed on representative finished parts rather than relying only on the original digital artwork.
Brand colors may need to remain consistent across production batches and different label versions.
A color specification should therefore be agreed upon with the printing supplier before mass production.
Where color matching is commercially important, the RFQ should identify the required color reference system and acceptance criteria.

After printing, the label must be converted into a form that can be reliably picked and inserted into the mold.
Die cutting defines the final label geometry.
Cutting accuracy is important because the finished label must correspond to the product and mold design.
Potential issues include:
- Incorrect label dimensions
- Burrs or damaged edges
- Inconsistent cutting
- Poor separation
- Distorted label geometry
For automated IML, dimensional consistency becomes particularly important because the robot or pickup mechanism works with repeated label positions.
Static electricity can affect label separation and handling.
Depending on the material and production environment, static may contribute to:
- Multiple labels being picked together
- Labels sticking together
- Incorrect pickup
- Label movement during transfer
The label supplier and automation integrator should consider static behavior when establishing the handling process.
Consistent stacking allows the pickup system to operate predictably.
The stack should maintain:
- Consistent label orientation
- Stable edges
- Controlled height
- Repeatable separation
- Minimal deformation
Poor stack quality can create automation problems even when the printed labels themselves meet the artwork specification.
Label orientation should be clearly defined before automation programming.
This is especially important for products with:
- Directional graphics
- Logos
- Barcodes
- Multiple label orientations
- Asymmetric product geometry
The label drawing should identify the intended orientation relative to the product and mold.
Once the labels have been printed, cut and stacked, they must be transferred into the mold with sufficient repeatability.
The pickup mechanism removes an individual label from the stack and transfers it toward the mold.
The pickup method depends on label characteristics and system design.
The automation system may need to account for:
- Label thickness
- Surface characteristics
- Static
- Label shape
- Stack condition
- Required cycle time
A robot or dedicated automation mechanism can transfer the label from the supply position to the mold.
The transfer sequence must be synchronized with the injection molding machine and mold cycle.
For multi-cavity applications, the number and arrangement of labels must also correspond to the cavity layout.
Vacuum and electrostatic methods are among the possible approaches for holding labels during transfer and mold positioning.
The appropriate method depends on the label substrate, geometry, surface characteristics and automation design.
The objective is straightforward: the label must reach the intended position and remain there until the mold closes.
The label is inserted into the mold and positioned against the designated mold surface.
Mold geometry, label dimensions and robot movement must work together to prevent:
- Label displacement
- Folding
- Wrinkling
- Collision
- Incorrect orientation
The mold and automation interfaces should therefore be considered together during project planning.
After the label is positioned, the mold closes and plastic is injected.
Melt flow and processing conditions influence how the plastic interacts with the label.
The process should be developed to achieve the required:
- Label coverage
- Surface appearance
- Product dimensions
- Registration
- Part quality
The actual processing window depends on the resin, label construction, mold and product geometry.
After cooling, the molded part is ejected.
The finished product should be checked for both molding quality and label quality.
Inspection may include:
- Label position
- Graphic registration
- Wrinkles
- Air bubbles
- Surface appearance
- Product dimensions
- Barcode readability where applicable

Printing and label specifications alone cannot guarantee final IML quality. Injection molding conditions also influence the finished product.
The initial label position inside the mold is one of the most important variables.
If the label is incorrectly positioned before mold closing, the finished part may show visible registration errors.
Repeatable robot positioning and suitable mold reference features can help maintain consistency.
The flow of molten plastic can influence the appearance and behavior of the label during injection.
Product geometry, gate location, injection speed and material behavior all contribute to the final result.
Molding conditions should therefore be developed around the actual product and label construction rather than copied directly from another IML application.
Air trapped between the label and molded plastic can affect surface appearance.
Potential symptoms include:
- Bubbles
- Localized surface defects
- Incomplete label contact
- Visible marks
Mold venting, label positioning and injection conditions should be evaluated together when troubleshooting these problems.
Warpage can affect both the molded component and the relationship between the label and product surface.
Potential causes may include:
- Uneven cooling
- Product geometry
- Material behavior
- Mold temperature variation
- Processing conditions
The label should therefore be evaluated as part of the complete molded component rather than as an independent layer.
A stable IML process requires repeatability across the complete cycle.
Relevant variables include:
If the molding cycle is stable but label pickup varies, the overall process may still produce inconsistent products.
| Defect | Possible causes | Areas to check |
| Label shift | Incorrect pickup or mold positioning | Robot path, label orientation, mold reference |
| Wrinkle | Label deformation or poor positioning | Label stiffness, pickup, mold surface, injection conditions |
| Bubble or trapped air | Air remaining between label and plastic | Venting, label contact, injection conditions |
| Poor registration | Printing, cutting or positioning variation | Artwork, die cutting, robot positioning |
| Print damage | Label construction or molding conditions | Ink system, label supplier specification, processing conditions |
| Incomplete label coverage | Label geometry or molding behavior | Label dimensions, product geometry, melt flow |
| Multiple-label pickup | Static or poor separation | Label stack, material surface, pickup method |
| Label orientation error | Incorrect handling or robot programming | Stack orientation, robot coordinates, mold reference |
Troubleshooting should begin by identifying where the variation was introduced.
For example, a registration problem may originate in artwork or printing, while a label shift may occur during stacking, pickup, transfer or mold insertion. Treating every IML defect as an injection molding problem can therefore lead to unnecessary process adjustments.
An IML project should provide enough information for the label supplier, mold builder, automation integrator and injection molding machine supplier to evaluate the complete process.
Provide:
- Product drawing
- Product dimensions
- Label placement area
- Mold drawing where available
- Number of cavities
- Gate configuration where available
- Mold dimensions and weight
- Mold opening requirements
- Mold change method
Specify:
- Resin type
- Resin grade
- Color
- Recycled content if applicable
- Processing requirements where available
For example, PP may be specified as the base resin, but the exact grade should be identified when known.
Provide:
- Label substrate
- Material grade
- Thickness
- Surface characteristics
- Supplier technical data
- Special material requirements
Provide:
- Artwork file
- Label dimensions
- Print area
- Color requirements
- White or opaque areas
- Barcode / QR code requirements
- Registration requirements
- Product orientation
The label drawing should specify:
- Length
- Width
- Shape
- Corner geometry
- Cut tolerance
- Orientation
- Quantity per product
Cavity count affects the number of labels that must be inserted during each molding cycle.
For multi-cavity molds, the label layout and robot handling sequence should be planned accordingly.
Provide the target production cycle whenever available.
Cycle time affects the required speed of:
- Label pickup
- Robot transfer
- Mold insertion
- Injection molding
- Part handling
Specify the expected handling approach where known:
- Vacuum pickup
- Electrostatic pickup
- Other project-specific method
- Label stack arrangement
- Robot access
- Mold insertion direction
- Required automation level
The following information can be used as a starting point when requesting an IML solution:
| RFQ Item | Example Input |
| Product dimensions | Customer supplied |
| Resin | PP / project-specific resin |
| Label substrate | Supplier grade |
| Label thickness | Supplier specification |
| Printing method | To be confirmed |
| Label dimensions | Drawing |
| Number of cavities | Mold data |
| Target cycle | Production target |
| Robot handling | Vacuum / electrostatic / project-specific |
| Artwork | Customer supplied |
| Label orientation | Product and mold drawing |
| Mold information | Mold drawing / specification |
| Production volume | Annual or monthly target |
Providing this information at the beginning of the project can reduce communication gaps between packaging, printing, molding and automation teams.
IML printing is the printing of labels intended to be placed inside an injection mold and integrated with the molded plastic product during the molding process. The printing stage is only one part of the overall IML workflow, which also includes die cutting, stacking, pickup, mold positioning and injection molding.
PP is commonly used for IML labels, particularly for PP molded products. However, the appropriate substrate depends on the application, resin, label construction, printing system and molding requirements. The final material should be confirmed with the label supplier.
A conventional pressure-sensitive adhesive is not necessarily required for IML. The label is positioned inside the mold before injection and becomes integrated with the molded component during the molding process. The exact label construction depends on the application and material system.
An IML label can be positioned using automation methods such as vacuum or electrostatic handling, depending on the label material, geometry and system design. The mold and robot must be configured to maintain the required position until injection.
Possible causes include inconsistent label pickup, incorrect mold positioning, label flexibility, static, unsuitable handling conditions, mold geometry or injection conditions. Troubleshooting should examine the complete path from label stacking through mold insertion and molding.
At minimum, provide the product drawing, resin, label material and thickness, label dimensions, artwork, mold cavity count and target cycle. Mold information and expected robot handling method should also be provided when available.
Printing determines the graphic quality and registration of the label, while cutting and handling determine whether the label can be positioned consistently. Injection molding conditions then affect how the label interacts with the molded plastic. Final IML quality therefore depends on the complete printing-to-molding workflow.
A successful IML project requires coordination between the label specification, printing process, mold design, automation system and injection molding process.
If you are planning an IML packaging project, send Huarong your container drawing, resin, label specification, mold cavity count and target cycle.
Huarong can review the requirements and help evaluate the injection molding machine, mold interface and robotic IML integration for the intended production process.
- Group Name: Huarong Group
- Brand: Huarong, Yuhdak, Nanrong
- Service Offerings: Injection Molding Machine, Vertical Injection Molding Machine, Injection Molding Automation
- Tel: +886-6-7956777
- Address: No.21-6, Zhongzhou, Chin An Vil., Xigang Dist., Tainan City 72351, Taiwan
- Official Website: https://www.huarong.com.tw/